")
The organisation page lists and details all the organizations in your Jeffrey AI workspace, detailing their contact details, location, industry, and more. You can view your organizations by selecting the suitcase icon on the taskbar.
The organisation’s page is very similar to the contacts page but in a more simplified format. The page itself provides a list of all the organisations and some important information about them.
Many of the general features in Jeffrey AI are usable on this page. The filters, search bar, gear, and arrow buttons are available on this page across the top, and page settings are available across the bottom. The edit button also appears on each line to the left of the first field.
You can find out more information about all these buttons in the General features section of this user guide.
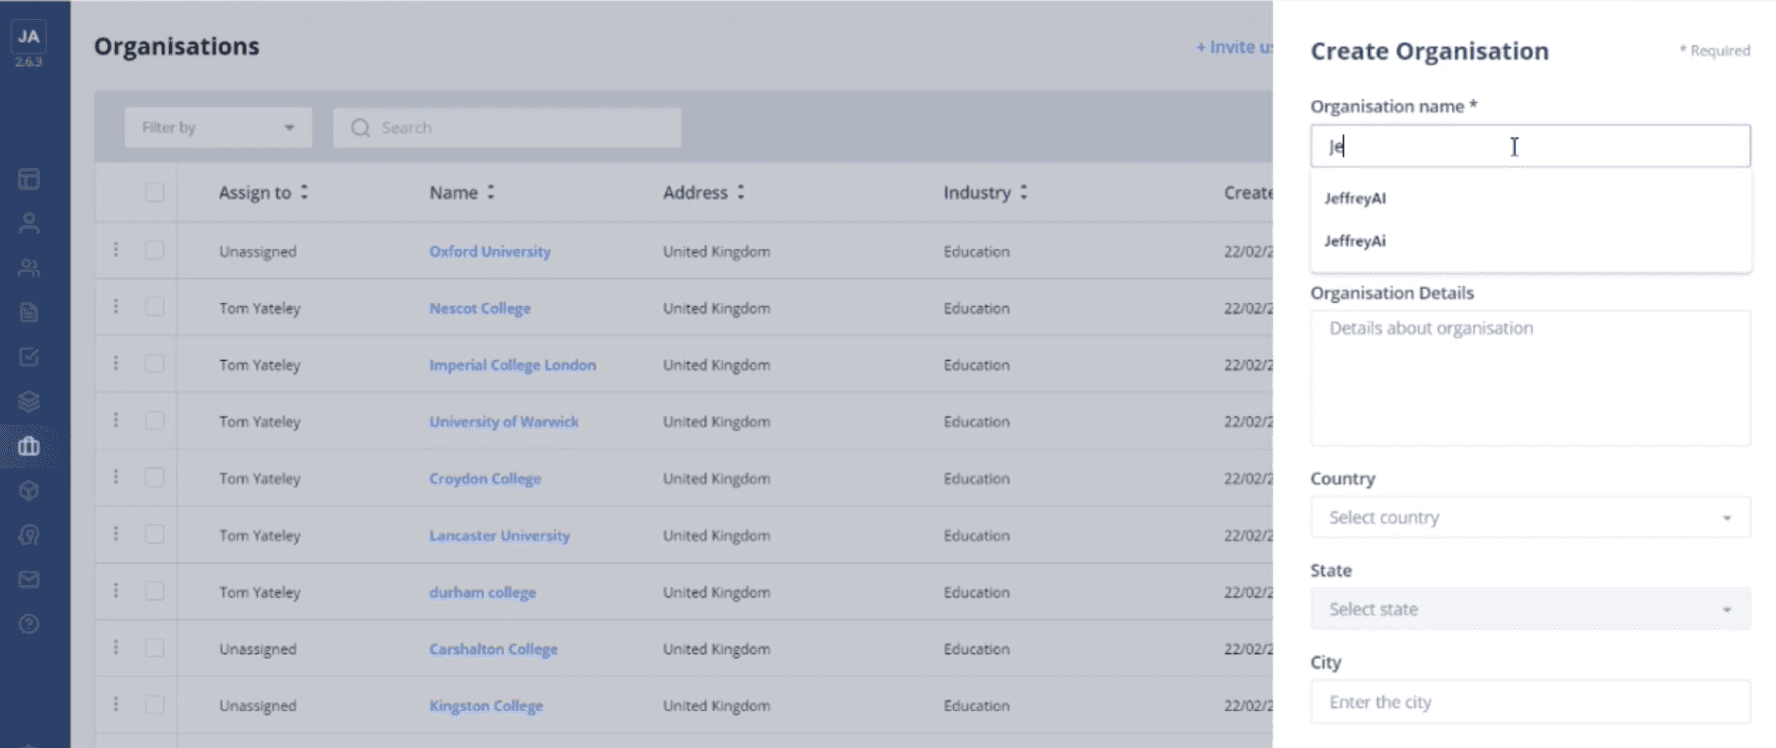
Creating a new Organisation
To create a new organisation, select the “Create Organisation” button in the top right corner of the page.
This will open a side-column on the right of the screen where you can fill out all the organization details.
Mandatory fields are noted with an asterisk and many of the fields are free text. Some fields such as industry and “Assign to” are drop-down menus.
The Country and State fields are dropdown menus. The state field will display information related to the country that has been selected. For example, it will display the states of the USA or the counties of the UK if one of those was selected as the country respectively.
Some fields, such as mobile and email, will notify you with an error message if their format is incorrect.
Once all the mandatory fields are filled, the create button at the bottom of the column will change color from grey to blue and you will be able to save that organization. You can also choose to cancel at any time.
Once your new organization is created, it will appear in the organization table and you will be able to assign contacts to it.
Adding Contacts to an Organisation
There are 3 ways to add a contact to an organization. The first two ways are through the contact pages when creating or editing a contact. For more details on these methods please visit the contacts section of the User guide.
- On hold, adding a way to add contacts via the organization’s page.
Organization Details
Click on an organization’s name to view the organization’s details. The details page is very similar to the contacts page but with a few notable differences, including the editable information and display.
The left-hand column details the organization’s profile, contact information, location, and any linked deal information. You can also select to contact the organization or create a note or task by selecting the buttons underneath the profile picture.
For more details about creating a note or task, please see “Adding tasks and activities to a contact or organization” in the General features section of this user guide.
You can edit information in the left-hand column by clicking the field you wish to edit. This will create a typing prompt for you to edit. A pencil icon will appear on the right side of the field to confirm it is being edited. Once you are finished, click away from the field to save your changes automatically.
Some fields, such as phone, mobile, and email, will display an error message will display if the format of the edited information is incorrect.
You can select the industry of the organization via a dropdown menu, failing to click on any of the options will leave the industry field blank.
If you wish to edit the address of the organization, you can do so by selecting the address field. Unlike the other fields, this will expand the column temporarily and allow you to fill out the full address.
In similarity to creating an organization, the country and state fields will be dropdown menus linked to one another. Please see “Creating a new organization” in this section for more information.
Once you have finished editing, click “Save changes” to update the address. Any changes should also be reflected in the map which displays further down the column.
If you scroll down to the bottom of the left-hand column, you will find an option to delete the organization. If you select this button, you will be asked to confirm your actions before the Organisation is deleted.
It is important to note that deleting an organization will not delete any contacts linked to it, but it will remove that organization from its details.
The activities table takes up most of the organization’s details page. You will be able to see all the activities linked to the organization either as standalone or through contacts in this table. The most recent activity will display at the top, and you can scroll down to find previous actions involving the company.
You can also filter by actions by selecting the corresponding filter at the top left of the table.
You can also use this table to find every contact linked to the organization by selecting “Contacts” in the top left corner of the table. This will show a contacts table identical to that on the contacts page, but it will only contain contacts linked to the organization.
Many of the general features are available to use in this table, you can also create groups and engagements for one or more contacts as described in “Table view” in the Contacts section of this user guide.